
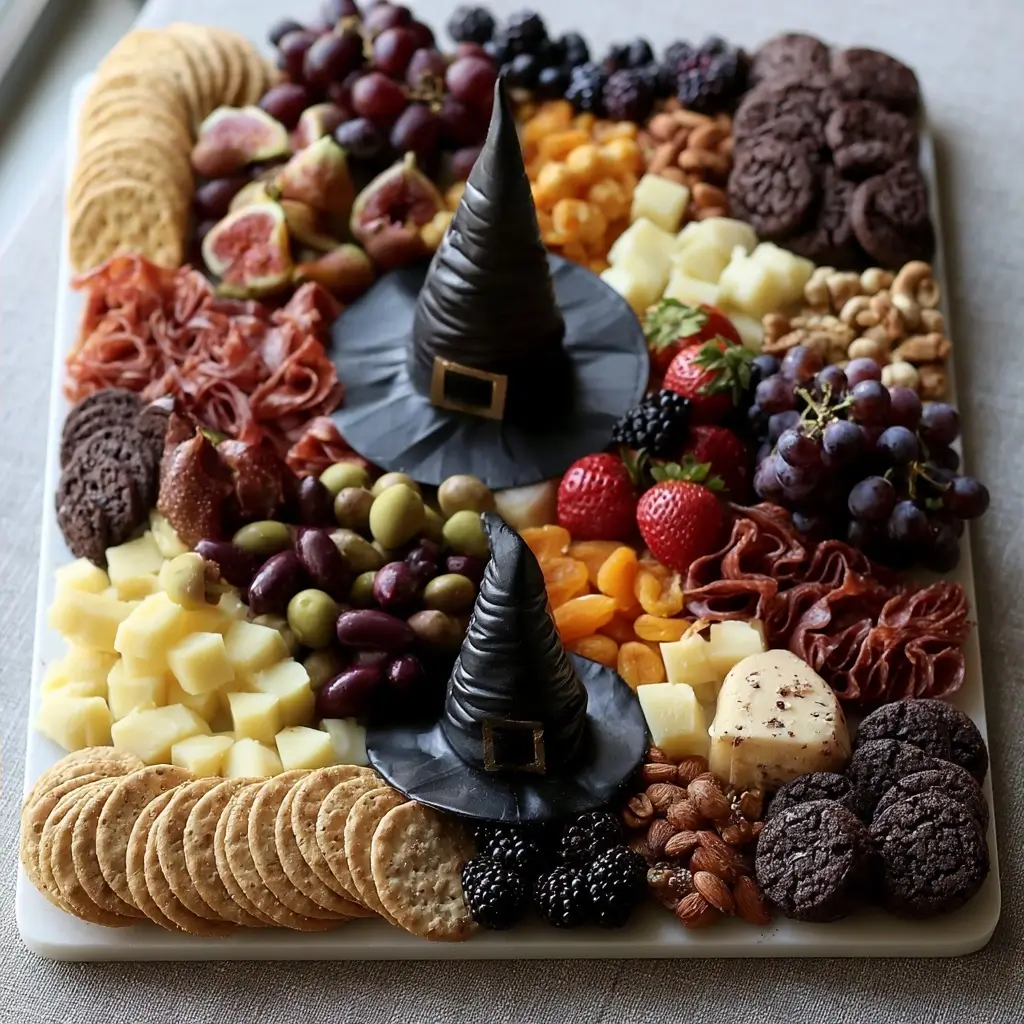
Halloween parties always feel a little more fun when there is a platter in the middle of the table that makes everyone smile. This festive cheese board brings together creamy cheeses, crisp crackers, fruit, and playful witch hat shapes for a spooky-cute centerpiece.
Halloween Cheese Board
Equipment
- 1 Large cutting board, tray, or platter
- 1 Serving knives and spoons optional
- 2 Small bowls for dips or wet ingredients
Instructions
- Start with a large cutting board, tray, or platter. A wooden board gives the prettiest rustic look, but any large flat surface works well.
- Arrange the cheeses first so they anchor the board. Leave space between each one to make room for the other ingredients.
- Use triangle-shaped crackers, folded slices of turkey pepperoni, or dark chocolate pieces to create fun witch hat inspired accents around the board. Small stacked cheese triangles also work nicely.
- Set the fruit, olives, tomatoes, nuts, and bread around the cheese. Group similar colors together for a more polished look.
- Tuck in fresh herbs to give the board a fresh, festive feel. Add dips in small bowls last, then place serving knives and spoons where guests can reach them easily.
Notes
Why You’ll Love This Halloween Cheese Board
This board is easy to assemble, looks impressive, and lets you mix sweet, salty, creamy, and crunchy bites all in one place. It is also flexible, so you can scale it up for a crowd or keep it small for a cozy night in.
Halloween Cheese Board Ingredients & Substitutions
- 2 to 3 cheeses, such as cheddar, gouda, brie, or mozzarella
- Crackers, breadsticks, or sliced baguette
- Grapes or sliced apples
- Black and green olives
- Turkey pepperoni or turkey slices, cut into fun shapes
- Cherry tomatoes
- Roasted nuts
- Fresh rosemary or parsley for garnish
- Chocolate cookies or dark chocolate pieces for a sweet touch
- Optional dips, such as hummus, honey, or fruit spread
If you want a little more color, add strawberries, kiwi, or orange bell pepper strips. For a softer cheese option, swap brie for cream cheese or a mild spreadable cheese. You can also use sunflower seeds instead of nuts if needed.
Step-by-Step Instructions to Make Halloween Cheese Board
1. Choose your board
Start with a large cutting board, tray, or platter. A wooden board gives the prettiest rustic look, but any large flat surface works well.
2. Place the cheeses
Arrange the cheeses first so they anchor the board. Leave space between each one to make room for the other ingredients.
3. Add the witch hat touches
Use triangle-shaped crackers, folded slices of turkey pepperoni, or dark chocolate pieces to create fun witch hat inspired accents around the board. Small stacked cheese triangles also work nicely.
4. Fill in the gaps
Set the fruit, olives, tomatoes, nuts, and bread around the cheese. Group similar colors together for a more polished look.
5. Finish with garnish
Tuck in fresh herbs to give the board a fresh, festive feel. Add dips in small bowls last, then place serving knives and spoons where guests can reach them easily.
Tips for Success
Use a mix of textures so every bite feels interesting. Slice a few cheeses ahead of time to make serving easier, and let firmer cheeses sit at room temperature for about 20 minutes before serving for the best flavor.
Keep wet ingredients like olives and tomatoes in small bowls if you want the board to stay neat longer. If you are making it early, add crackers and bread just before guests arrive so they stay crisp.
Variations of Halloween Cheese Board
For a sweeter version, lean into fruit, chocolate, and honey with just one or two mild cheeses. For a more savory platter, add extra cured turkey slices, pickles, and roasted vegetables.
You can also turn this into mini boards for kids by using smaller plates and simple ingredients like cheese cubes, grapes, crackers, and apple slices. Another fun idea is to use orange and black foods to match the Halloween theme.
Serving Suggestions: What to Pair with Halloween Cheese Board
This platter pairs nicely with warm soup, a simple salad, or a tray of baked finger foods. It also works well alongside sparkling water with citrus slices, apple cider, or a fruit punch for a party table.
If you are serving it as part of a larger spread, add olives, vegetable sticks, and a few extra dips so guests can graze at their own pace.
Storage & Reheating Instructions
Store leftovers in separate airtight containers in the refrigerator for up to 3 days. Crackers and bread should be kept in a dry container at room temperature, if possible, so they do not soften.
This board does not need reheating, but cheese tastes best when it sits out briefly before serving. If anything was chilled, let it rest for 15 to 20 minutes so the flavors come through more fully.
Memories Made Around the Table
I love a recipe like this because it invites people to gather, nibble, and chat without fuss. A festive board often becomes the first thing guests notice and the last thing they remember, which is exactly what makes it so special.
FAQs
Can I make this Halloween cheese board ahead of time?
Yes, you can prep most of the ingredients a few hours ahead. For the best texture, add crackers and bread right before serving.
What cheeses work best for this platter?
Cheddar, gouda, brie, and mozzarella all work well because they offer different flavors and textures. Choose a mix of mild and sharp cheeses for balance.
How do I keep the board looking full?
Use small piles and clusters instead of spreading everything too far apart. Fill empty spots with herbs, nuts, or extra fruit so the board feels abundant.
Can I make it kid-friendly?
Absolutely. Keep the flavors simple, use mild cheese, fruit, crackers, and fun shapes, and skip any spicy add-ins.
Final Thoughts
This Halloween cheese board is a simple way to make your table feel festive without spending hours in the kitchen. With a few thoughtful ingredients and a playful arrangement, you will have a platter that feels welcoming, seasonal, and party-ready.