
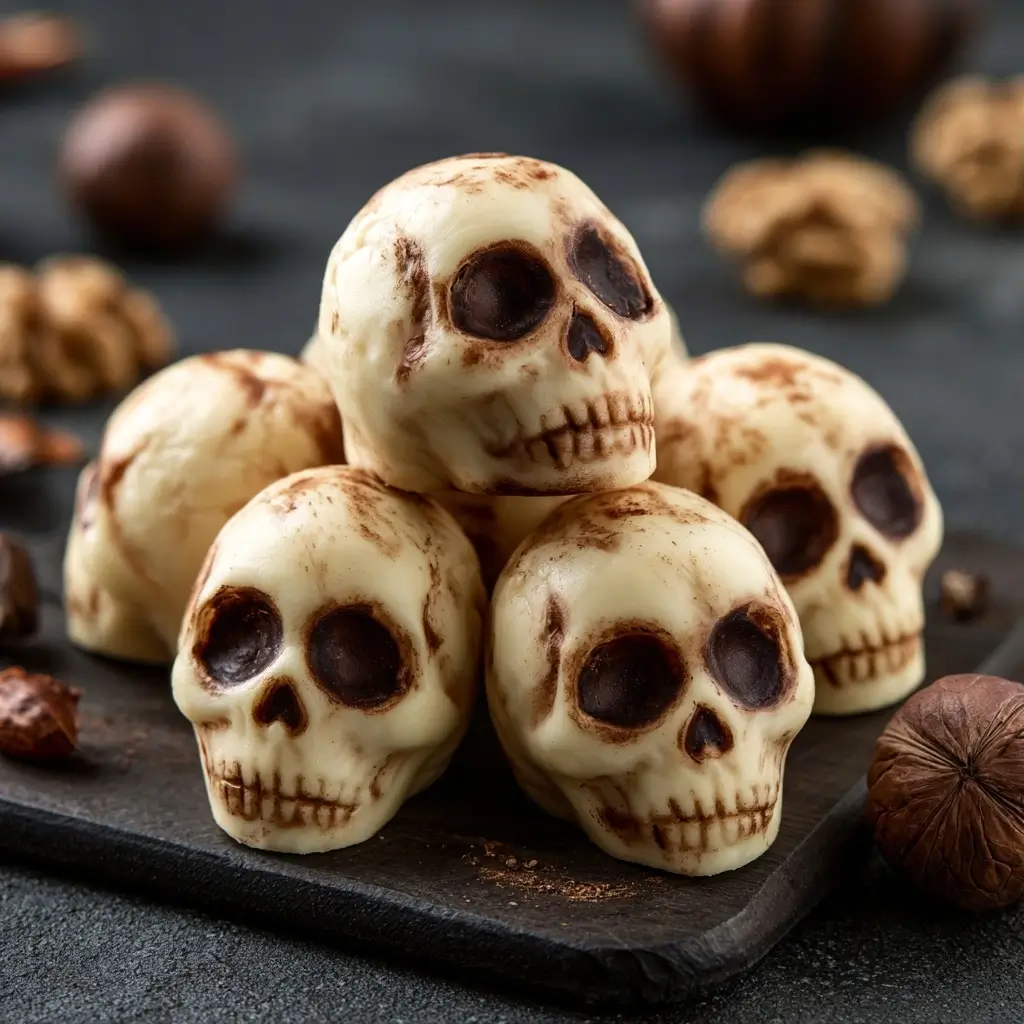
Spooky Walnut Skulls are a fun, nostalgic treat that looks impressive but comes together with simple ingredients and a little patience. They have a sweet, rich filling and a crisp finish that makes them perfect for sharing at fall gatherings or a themed dessert table.
Spooky Walnut Skulls
Equipment
- 1 Tray lined
- 1 Small piping bag or zip-top bag with corner snipped off
Ingredients
- 24 walnut halves for the skull shells
- 1 cup sweet filling such as cookie dough marzipan, or a simple nutty mixture
- ¼ cup powdered sugar if needed for sweetness
- 1 tablespoon butter or neutral oil for binding the filling
- ½ teaspoon alcohol-free vanilla for flavor
- 1 pinch salt to balance the sweetness
- 2 tablespoons melted chocolate or simple icing for decorating the faces
Instructions
- Sort through the walnut halves and choose the best shaped pieces. Wipe them clean if needed, then set them aside on a tray so they are ready for filling.
- Mix your filling ingredients in a bowl until you get a smooth, moldable texture. The mixture should hold its shape when pressed, but still feel soft enough to work with.
- Take a small amount of filling and press it gently between two walnut halves, or shape it to fit one side if you are making open-faced versions. Smooth the edges with your fingers so the skull shape looks neat.
- Use melted chocolate or icing to draw eyes, a nose, and little tooth marks. Keep the design simple, because even tiny details make them look charming and festive.
- Place the finished skulls on a lined tray and let them rest until the coating firms up. Once set, they are ready to serve or store.
Notes
Why You’ll Love This Spooky Walnut Skulls
These little treats are the kind of recipe that gets people talking before they even take a bite. They are playful, crunchy, sweet, and easy to make ahead, which makes them a great choice when you want something special without a lot of stress.
Spooky Walnut Skulls Ingredients & Substitutions
Here is what you will need to make this recipe.
- Walnut halves, for the skull shells
- Sweet filling such as cookie dough, marzipan, or a simple nutty mixture
- Powdered sugar, if needed for sweetness
- Butter or neutral oil, for binding the filling
- Alcohol-free vanilla, for flavor
- Pinch of salt, to balance the sweetness
- Melted chocolate or a simple icing, for decorating the faces
Helpful substitution ideas:
- Use almond flour instead of finely ground nuts if you want a softer filling.
- Swap butter for a neutral oil if you need a dairy-free option.
- Use maple syrup or honey in small amounts to help bring the filling together.
- If you want a darker look, add a little cocoa powder to the filling or coating.
Step-by-Step Instructions to Make Spooky Walnut Skulls
1. Prepare the walnuts
Sort through the walnut halves and choose the best shaped pieces. Wipe them clean if needed, then set them aside on a tray so they are ready for filling.
2. Make the filling
Mix your filling ingredients in a bowl until you get a smooth, moldable texture. The mixture should hold its shape when pressed, but still feel soft enough to work with.
3. Shape the skulls
Take a small amount of filling and press it gently between two walnut halves, or shape it to fit one side if you are making open-faced versions. Smooth the edges with your fingers so the skull shape looks neat.
4. Add the spooky details
Use melted chocolate or icing to draw eyes, a nose, and little tooth marks. Keep the design simple, because even tiny details make them look charming and festive.
5. Let them set
Place the finished skulls on a lined tray and let them rest until the coating firms up. Once set, they are ready to serve or store.
Tips for Success
Choose walnut halves that are as similar in size as possible so the skulls look balanced. If your filling feels too soft, chill it for a few minutes before shaping. For cleaner decorating, let the shells set fully before piping on the face details.
Variations of Spooky Walnut Skulls
You can make these in a few different ways depending on your mood. Try a cocoa filling for a deeper flavor, add finely chopped dried fruit for a chewy bite, or dust the finished pieces lightly with powdered sugar for a ghostly look. You can also use a touch of cinnamon or cardamom for a warm, cozy twist.
Serving Suggestions: What to Pair with Spooky Walnut Skulls
These are lovely with hot tea, coffee, or warm spiced milk. They also fit nicely on a dessert board with fresh fruit, plain cookies, and other bite-sized sweets. If you are serving them for a party, place them on a dark platter to make the shapes stand out.
Storage & Reheating Instructions
Store the skulls in an airtight container in the refrigerator for up to 5 days. If you prefer them at room temperature, let them sit out for about 15 minutes before serving. These are best enjoyed fresh, so I do not recommend reheating them.
Memories Made Around the Table
Recipes like this always feel a little extra special to me because they bring a sense of play to the table. I love serving treats that make people smile first and then reach for a second one after the first bite.
FAQs
Can I make Spooky Walnut Skulls ahead of time?
Yes, these are a great make-ahead treat. Prepare them a day or two before serving and keep them chilled until needed.
What if my filling is too sticky?
Add a little more powdered sugar, ground nuts, or chilled butter to firm it up. You can also chill the mixture briefly before shaping.
Can I use another nut instead of walnuts?
Yes, pecan halves or almond pieces can work, though the shape and texture will be a little different. Walnut halves give the best skull-like look.
How do I keep the decorations neat?
Use a small piping bag or a tiny zip-top bag with the corner snipped off. Let the base set first so the details do not smudge.
Final Thoughts
Spooky Walnut Skulls are a charming little treat that turns simple ingredients into something memorable. They are fun to make, easy to customize, and perfect when you want a dessert that feels festive without being fussy.