
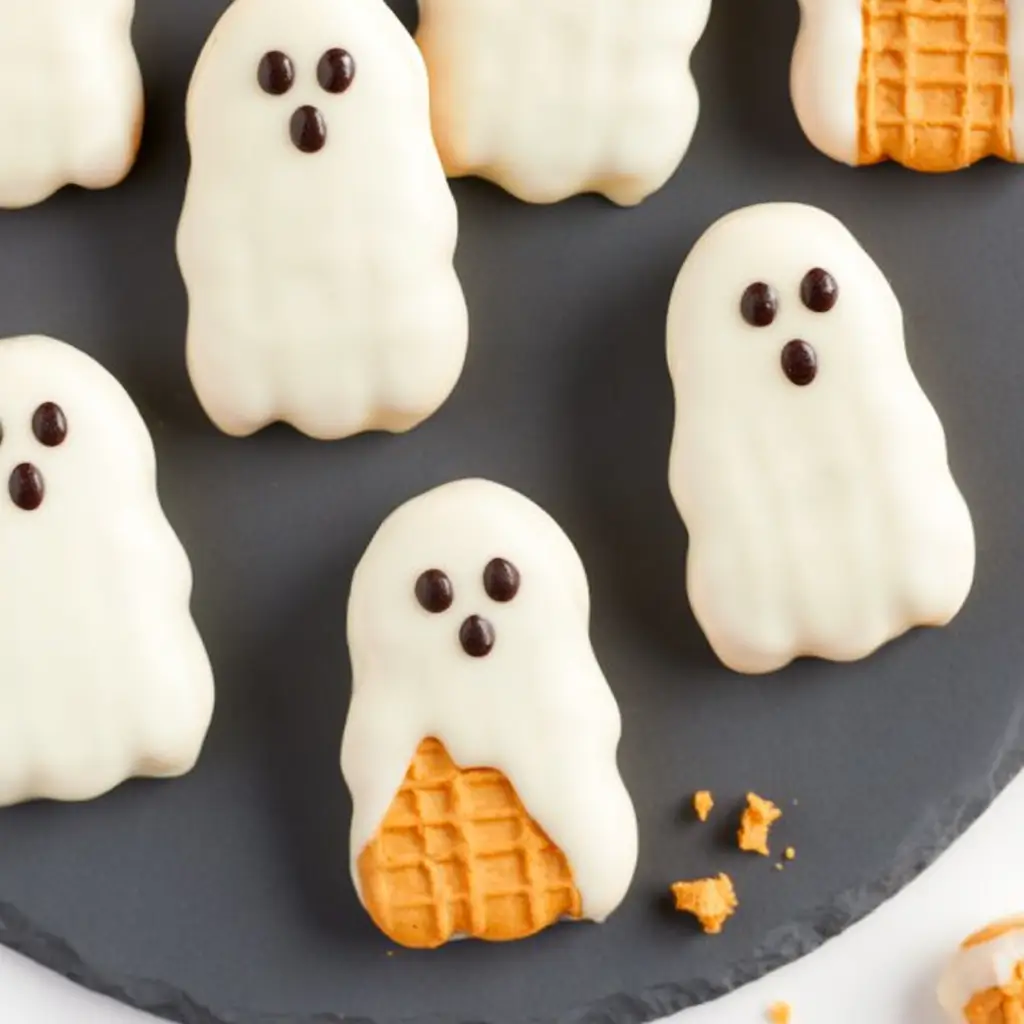
These spooky little cookies are a fun treat to make for Halloween parties, bake sales, or a cozy afternoon in the kitchen. They use simple ingredients and come together fast, which makes them perfect when you want something cute without a lot of fuss.
Spooky Ghost Cookies
Equipment
- 1 Baking Sheet
- 1 Parchment Paper
- 1 Microwave-safe Bowl
- 1 Fork for dipping
Ingredients
- 24 Nutter Butter cookies
- 12 oz white candy melts or white chocolate
- 0.5 cup mini chocolate chips for the faces, or melted dark chocolate
- 0.25 cup crushed pretzels or sprinkles optional, for extra decoration
Instructions
- Line a baking sheet with parchment paper and set the Nutter Butter cookies on it so they are ready for dipping.
- Melt the white candy melts according to the package directions, stirring until smooth and glossy.
- Dip each cookie into the melted coating, letting the excess drip off before placing it back on the parchment paper.
- While the coating is still soft, add mini chocolate chips for eyes and a small chocolate mouth, or pipe on the features with melted chocolate.
- Leave the cookies at room temperature until the coating is fully set, or place them in the refrigerator for a few minutes to speed things up.
Notes
Why You’ll Love This Spooky Ghost Cookies
These cookies are playful, sweet, and easy to decorate, even if you are not a confident baker. They have a creamy filling, a crisp chocolate cookie base, and just the right amount of chocolate for the ghost faces.
Spooky Ghost Cookies Ingredients & Substitutions
- Nutter Butter cookies
- White candy melts
- Mini chocolate chips or melted dark chocolate for the faces
- Optional, crushed pretzels or sprinkles for extra decoration
If you cannot find white candy melts, you can use white chocolate instead. If you want the faces a little easier to draw, melt the chocolate until smooth and use a piping bag or a small zip-top bag with the corner snipped.
Step-by-Step Instructions to Make Spooky Ghost Cookies
Step 1: Prepare the cookies
Line a baking sheet with parchment paper and set the Nutter Butter cookies on it so they are ready for dipping.
Step 2: Melt the coating
Melt the white candy melts according to the package directions, stirring until smooth and glossy.
Step 3: Coat each cookie
Dip each cookie into the melted coating, letting the excess drip off before placing it back on the parchment paper.
Step 4: Add the ghost faces
While the coating is still soft, add mini chocolate chips for eyes and a small chocolate mouth, or pipe on the features with melted chocolate.
Step 5: Let them set
Leave the cookies at room temperature until the coating is fully set, or place them in the refrigerator for a few minutes to speed things up.
Tips for Success
Work in small batches so the coating stays smooth and easy to dip. If the candy melts thicken too much, warm them gently and stir well. For cleaner-looking faces, add the chocolate details before the coating firms up.
Variations of Spooky Ghost Cookies
You can make these cookies with white chocolate, add colored sprinkles for a playful look, or use different cookie shapes if you want a fun twist. A tiny drizzle of dark chocolate also makes the ghost features stand out nicely.
Serving Suggestions: What to Pair with Spooky Ghost Cookies
Serve these with cold milk, hot cocoa, or a simple dessert tray with fruit and other small treats. They also look adorable on a Halloween platter with cupcakes, popcorn, or candy apples.
Storage & Reheating Instructions
Store the finished cookies in an airtight container at room temperature for up to 5 days. If your kitchen is warm, keep them in the refrigerator so the coating stays firm. These cookies do not need reheating, just let chilled cookies sit out for a few minutes before serving.
Memories Made Around the Table
There is something especially fun about recipes that make everyone smile before the first bite. These little ghost cookies always feel like a sweet excuse to slow down, decorate together, and enjoy a simple homemade treat.
FAQs
Can I make these ahead of time?
Yes, you can make them a day or two in advance. Just store them in an airtight container until you are ready to serve.
What is the easiest way to make the faces?
Mini chocolate chips are the easiest option. You can also use melted chocolate in a piping bag for more control.
Can I use white chocolate instead of candy melts?
Yes, white chocolate works well. Melt it slowly so it stays smooth and easy to dip.
How do I keep the coating from getting messy?
Use parchment paper and let the extra coating drip off before setting the cookies down. A fork can also help lift each cookie from the melted coating.
Final Thoughts
These spooky little cookies are proof that a simple recipe can still feel special. They are cute, easy to make, and always a hit when you want a festive treat with very little stress.