
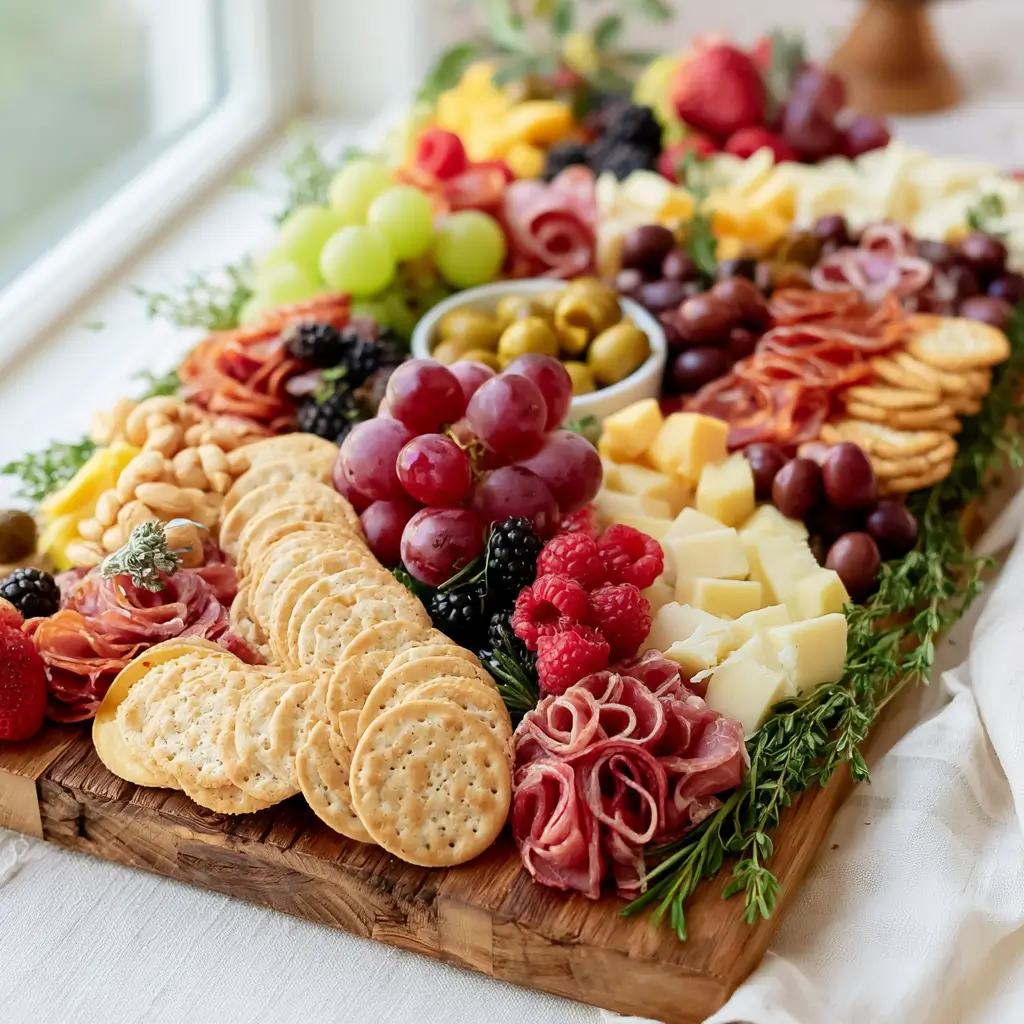
Picnic boards are one of my favorite ways to feed a crowd outdoors, because they feel relaxed, generous, and easy to customize. This version is built for sunny afternoons, with a mix of sweet, savory, crisp, and creamy bites that hold up well on a blanket or picnic table.
Picnic Charcuterie Board Ideas
Equipment
- 1 Platter, cutting board, or shallow tray
- 1 Small bowls for dips
Ingredients
Picnic Charcuterie Board
- Assorted cheeses such as cheddar, gouda, and mozzarella
- Cured meats such as turkey salami or turkey pepperoni
- Crackers and breadsticks
- Fresh fruit such as grapes, strawberries, apple slices, or berries
- Vegetables such as cucumber slices, cherry tomatoes, and baby carrots
- Hummus or a creamy dip
- Mixed nuts
- Olives or pickles
- Fresh herbs for garnish
- Honey or fruit preserves
Instructions
- Select a platter, cutting board, or shallow tray that is easy to carry and large enough to hold all your picnic snacks without crowding.
- Set down small bowls of hummus, honey, or preserves, then add the cheese portions and any larger containers so they anchor the board.
- Fold or roll the turkey salami and turkey pepperoni, then tuck the crackers and breadsticks around the bowls and cheeses for easy access.
- Cluster the grapes, berries, cucumber slices, tomatoes, and carrots in different sections so the board looks abundant and balanced.
- Scatter nuts, olives, pickles, and herbs into open spaces. This final step brings the board together and gives it that fresh picnic look.
Notes
Why You’ll Love This This Recipe
This board is simple to assemble, looks beautiful without much effort, and lets everyone graze at their own pace. It is also flexible, so you can swap in seasonal fruit, different cheeses, or your favorite crackers based on what you have on hand.
This Recipe Ingredients & Substitutions
- Assorted cheeses, such as cheddar, gouda, and mozzarella
- Cured meats, such as turkey salami or turkey pepperoni
- Crackers and breadsticks
- Fresh fruit, such as grapes, strawberries, apple slices, or berries
- Vegetables, such as cucumber slices, cherry tomatoes, and baby carrots
- Hummus or a creamy dip
- Mixed nuts
- Olives or pickles
- Fresh herbs, for garnish
- Honey or fruit preserves
For substitutions, use any firm cheese that travels well, and choose gluten-free crackers if needed. If you want extra crunch, add pretzels or seeded crisps, and if you want more sweetness, include dried apricots, dates, or chocolate-covered almonds.
Step-by-Step Instructions to Make This Recipe
1. Choose a sturdy board or tray
Select a platter, cutting board, or shallow tray that is easy to carry and large enough to hold all your picnic snacks without crowding.
2. Place the dips and larger items first
Set down small bowls of hummus, honey, or preserves, then add the cheese portions and any larger containers so they anchor the board.
3. Add meats, crackers, and bread
Fold or roll the turkey salami and turkey pepperoni, then tuck the crackers and breadsticks around the bowls and cheeses for easy access.
4. Fill in with fruit and vegetables
Cluster the grapes, berries, cucumber slices, tomatoes, and carrots in different sections so the board looks abundant and balanced.
5. Finish with small bites and garnish
Scatter nuts, olives, pickles, and herbs into open spaces. This final step brings the board together and gives it that fresh picnic look.
Tips for Success
Keep cold ingredients chilled until just before serving, especially if you are eating outdoors on a warm day. Use firm fruit and vegetables that will not bruise quickly, and pack delicate items like sliced apples in lemon water to keep them looking fresh. If you are traveling, assemble the board at the picnic site for the best presentation.
Variations of This Recipe
For a sweeter board, add more fruit, shortbread cookies, and chocolate. For a heartier spread, include hard-boiled eggs, roasted chickpeas, or extra cheese cubes. You can also make a breakfast-style version with mini muffins, yogurt dip, and sliced melon.
Serving Suggestions: What to Pair with This Recipe
Serve the board with sparkling water, lemonade, iced tea, or fruit-infused water. It pairs nicely with a green salad, grilled chicken, or simple sandwiches if you want to build a fuller picnic meal.
Storage & Reheating Instructions
Store leftover cheese, meats, and cut produce in separate airtight containers in the refrigerator. Most of the board does not need reheating, but if you served breadsticks or crackers, keep those at room temperature in a sealed bag so they stay crisp.
Memories Made Around the Table
There is something special about setting out a pretty board and watching everyone naturally gather around it. Picnic food always feels a little more relaxed, and those easy shared moments are often the ones people remember most.
FAQs
How far ahead can I make a picnic charcuterie board?
You can prep most of it a few hours ahead. Keep the fruit, cheese, and meats chilled, then assemble close to serving time for the freshest look and texture.
What foods work best for an outdoor charcuterie board?
Choose sturdy items that travel well, such as firm cheeses, grapes, berries, crackers, nuts, and vegetables. Foods that soften quickly in heat are better left out.
How do I keep the board cold outside?
Pack the ingredients in a cooler with ice packs and place the board in the shade. If needed, set the platter over a tray filled with ice to help it stay cool longer.
Can I make this board without meat?
Yes, just add more cheese, hummus, nuts, olives, fruit, and vegetables. You can also include stuffed grapes, marinated artichokes, or roasted chickpeas for extra variety.
Final Thoughts
Picnic boards are such an easy way to make outdoor dining feel special without adding stress. With a little color, texture, and balance, you can build a spread that looks inviting and tastes even better.