
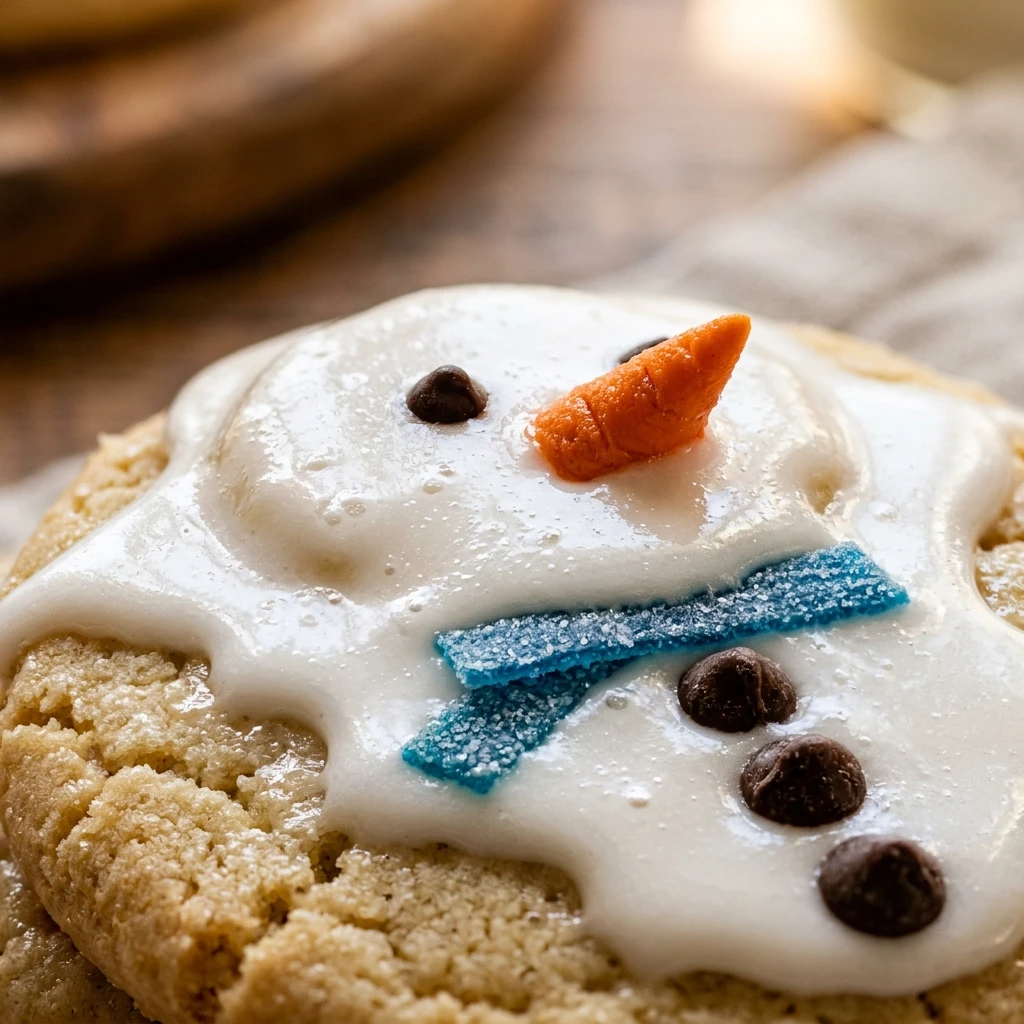
I always look forward to the holiday season when the kitchen becomes a flurry of flour and festive cheer. These Melted Snowman Cookies are one of my favorite treats to make because they always bring a smile to everyone’s face, regardless of their age. I love how each little snowman has its own personality, making them the perfect centerpiece for any Christmas dessert spread or a fun afternoon activity with the family.
Recipe Details
Recipe Information
- Prep Time: 25 minutes
- Cook Time: 10 minutes
- Total Time: 35 minutes
- Servings: 12 cookies
- Difficulty: Easy
Nutrition Information (Per Serving)
- Calories: 210 kcal
- Protein: 2 grams
- Carbs: 34 grams
- Fat: 8 grams
Why You’ll Love This Melted Snowman Cookies
These cookies are a whimsical addition to any holiday party, offering a creative twist on the classic sugar cookie. They are incredibly easy to assemble, which makes them a fantastic project for children who want to help in the kitchen. The combination of a soft cookie base with gooey marshmallows and sweet icing is simply irresistible, and the “melted” look means you do not have to worry about perfect decorating skills. Every imperfection just adds to the charm of your little snowmen.
Melted Snowman Cookies Ingredients & Substitutions
- 1/2 cup unsalted butter, softened
- 3/4 cup granulated sugar
- 1 large egg
- 1 teaspoon alcohol-free vanilla extract
- 1.5 cups all-purpose flour
- 1/2 teaspoon baking powder
- 1/4 teaspoon salt
- 12 large marshmallows
- 1 cup white icing or frosting
- Black decorating icing
- Orange decorating icing
- Small chocolate candies or colorful sprinkles for buttons
If you prefer a shortcut, feel free to use store-bought sugar cookie dough instead of making it from scratch. You can swap the white icing for melted white chocolate for a glossier finish, and if you do not have orange icing, a sliver of an orange candy slice or a carved piece of dried apricot makes a great carrot nose. For a different flavor profile, you could even use a gingerbread or chocolate cookie base instead of the traditional sugar cookie.
Step-by-Step Instructions to Make Melted Snowman Cookies
Step 1: Prepare the Oven and Baking Sheets
Preheat your oven to 350 degrees Fahrenheit. Line a large baking sheet with parchment paper or a silicone baking mat to ensure your cookies do not stick and are easy to remove once baked.
Step 2: Cream the Butter and Sugar
In a large mixing bowl, beat the softened butter and granulated sugar together until the mixture is light and fluffy. This usually takes about two to three minutes. Add the egg and the alcohol-free vanilla extract, then continue to beat until everything is well combined.
Step 3: Combine the Dry Ingredients
In a separate medium bowl, whisk together the all-purpose flour, baking powder, and salt. Gradually add these dry ingredients to the wet mixture, stirring until a soft dough forms. Be careful not to overmix, as this can lead to a tougher cookie texture.
Step 4: Bake the Cookies
Scoop about two tablespoons of dough for each cookie and roll them into balls. Place them on the prepared baking sheet, leaving about two inches of space between each one. Bake for eight to ten minutes, or until the edges are just barely golden. Remove from the oven and let them cool completely on a wire rack.
Step 5: Prepare the Snowman Heads
While the cookies are cooling, take your large marshmallows and use the black decorating icing to draw two eyes and a dotted mouth on one side of each marshmallow. Use the orange icing to draw a small triangle for the carrot nose. Let these sit for a few minutes to allow the icing to set.
Step 6: Assemble the Melted Snowmen
Once the cookies are cool, spread a generous amount of white icing over the top of each cookie, letting it drip slightly over the edges to look like a puddle of melted snow. Place a decorated marshmallow head near the edge of the icing puddle. Finally, add chocolate candies or sprinkles for buttons and use the icing to draw stick arms on the white “snow” puddle.
Tips for Success
- Wait until the cookies are completely cool before adding the icing, otherwise the “snow” will run off the cookie too quickly.
- If your white icing is too thick, add a few drops of milk or water to reach a consistency that spreads easily but still stays on the cookie.
- Use a toothpick to help place small decorations or to refine the shape of the snowman arms.
- Work on one cookie at a time so the icing is still wet when you add the marshmallow and buttons.
Variations of Melted Snowman Cookies
There are so many ways to customize these treats. You can use peanut butter cups cut in half to create little top hats for your snowmen, or use strips of sour candy belts to create colorful scarves. If you want a more rustic look, try using chocolate-covered pretzel sticks for the arms. You can also experiment with different cookie flavors, such as using a dark chocolate cookie to make the white icing “pop” even more.
Serving Suggestions: What to Pair with Melted Snowman Cookies
These cookies are best served with a warm beverage. A steaming mug of peppermint hot cocoa or a creamy glass of milk is the traditional choice for a cozy Christmas evening. If you are serving these at a party, they look wonderful on a platter surrounded by candy canes and white chocolate bark. They also make a lovely gift when tucked into a festive tin lined with holiday tissue paper.
Storage & Reheating Instructions
Store these cookies in an airtight container at room temperature for up to three to five days. To keep the decorations intact, place a sheet of parchment paper between layers of cookies. I do not recommend reheating these cookies, as the icing and marshmallows will melt and lose their shape. If you need to make them ahead of time, you can bake the cookie bases and freeze them, then decorate them a day before you plan to serve them.
Memories Made Around the Table
I remember one year my nieces and I spent the whole afternoon making these, and no two snowmen looked the same. We laughed so hard at the “puddle” snowmen that had their heads sliding off the edge, looking like they were truly melting under the kitchen lights. Every time I see these cookies now, I think of that messy table, the sticky fingers, and the pure joy of the holiday season. It is not about making them look perfect, it is about the stories you tell while the icing dries.
FAQs
Can I use store bought cookie dough for this recipe?
Yes, you can certainly use a tube of refrigerated sugar cookie dough or a boxed mix to save time. Just follow the baking instructions on the package and proceed with the decorating steps once the cookies have cooled.
How do I keep the icing from running off the cookie?
The key is the consistency of your icing. It should be thick enough to hold its shape but thin enough to spread. If it is too runny, add a little more powdered sugar. Also, ensure your cookies are 100 percent cool before you start frosting them.
Can these cookies be frozen after decorating?
It is not recommended to freeze the cookies once they are fully decorated. The marshmallows can become tough and the icing may crack or change texture when thawed. However, you can freeze the undecorated baked cookies for up to three months.
What is the best way to draw the faces on the marshmallows?
Using a small piping bag with a fine tip or a specialized edible ink marker is the easiest way to get detailed faces. If you do not have those, a toothpick dipped in icing works surprisingly well for small dots.
How long do these cookies stay fresh?
These cookies are best within the first three days of being made. After that, the marshmallow can start to get a bit stale. Keeping them in a very tight airtight container is the best way to preserve their softness.
Final Thoughts
Melted Snowman Cookies are more than just a sweet treat, they are a way to bring a little bit of winter magic into your home. Whether you are an expert baker or a beginner, the simplicity of this recipe allows you to focus on the fun of the holiday. I hope these cookies bring as much laughter and sweetness to your Christmas celebrations as they have to mine over the years. Happy baking and Merry Christmas.


Melted Snowman Cookies
- Total Time: 35 minutes
Ingredients
- 1/2 cup unsalted butter, softened
- 3/4 cup granulated sugar
- 1 large egg
- 1 teaspoon alcohol-free vanilla extract
- 1.5 cups all-purpose flour
- 1/2 teaspoon baking powder
- 1/4 teaspoon salt
- 12 large marshmallows
- 1 cup white icing or frosting
- Black decorating icing
- Orange decorating icing
- Small chocolate candies or colorful sprinkles for buttons
Instructions
- Preheat your oven to 350 degrees Fahrenheit. Line a large baking sheet with parchment paper or a silicone baking mat to ensure your cookies do not stick and are easy to remove once baked.
- In a large mixing bowl, beat the softened butter and granulated sugar together until the mixture is light and fluffy. This usually takes about two to three minutes. Add the egg and the alcohol-free vanilla extract, then continue to beat until everything is well combined.
- In a separate medium bowl, whisk together the all-purpose flour, baking powder, and salt. Gradually add these dry ingredients to the wet mixture, stirring until a soft dough forms. Be careful not to overmix, as this can lead to a tougher cookie texture.
- Scoop about two tablespoons of dough for each cookie and roll them into balls. Place them on the prepared baking sheet, leaving about two inches of space between each one. Bake for eight to ten minutes, or until the edges are just barely golden. Remove from the oven and let them cool completely on a wire rack.
- While the cookies are cooling, take your large marshmallows and use the black decorating icing to draw two eyes and a dotted mouth on one side of each marshmallow. Use the orange icing to draw a small triangle for the carrot nose. Let these sit for a few minutes to allow the icing to set.
- Once the cookies are cool, spread a generous amount of white icing over the top of each cookie, letting it drip slightly over the edges to look like a puddle of melted snow. Place a decorated marshmallow head near the edge of the icing puddle. Finally, add chocolate candies or sprinkles for buttons and use the icing to draw stick arms on the white “snow” puddle.
- Cook Time: 35 minutes
- Diet: Vegetarian