
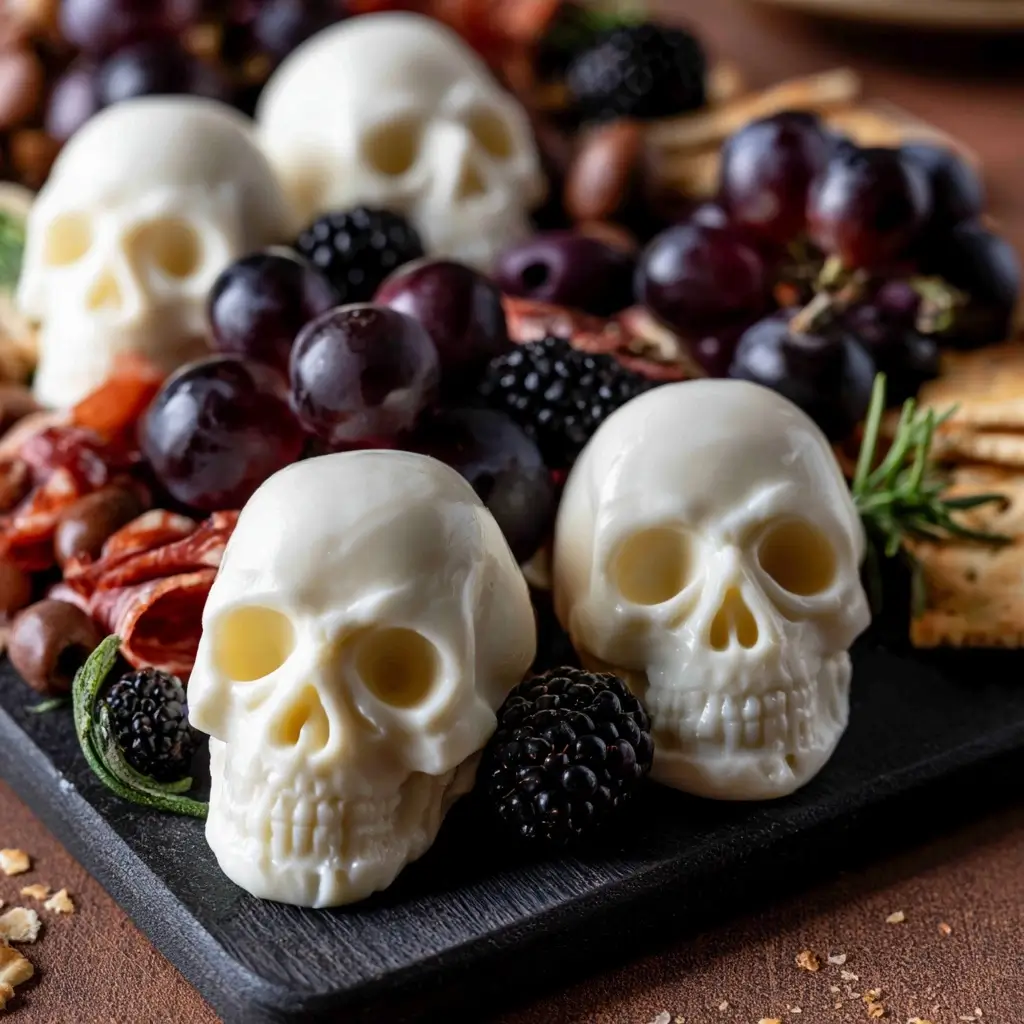
If you want a spooky little showpiece for your Halloween spread, these Halloween Mozzarella Skulls are such a fun choice. They are creamy, simple to make, and look fantastic tucked into a charcuterie board with crackers, fruit, and olives.
Halloween Mozzarella Skulls
Equipment
- 1 Skull molds small silicone, optional
- 1 Refrigerator
Ingredients
- 8 ounces fresh mozzarella
- Salt to taste
- Black pepper to taste, optional
- Fresh basil or parsley for serving, optional
- Assorted charcuterie board items such as crackers grapes, cucumber slices, cherry tomatoes, olives, and roasted nuts, for serving
Instructions
- Place the mozzarella in the refrigerator until it feels firm and easy to handle. Cold cheese is much easier to shape neatly.
- Gently press the mozzarella into skull molds or shape it by hand into small skull-like forms. If you have molds, pack the cheese in firmly so it holds the details.
- Sprinkle the mozzarella with a little salt and, if you like, a touch of black pepper. Keep the flavor simple so the cheese stays fresh and mild.
- Carefully remove the mozzarella skulls from the molds and place them on a serving board. Leave a little space around each one so the shape stands out.
- Fill the rest of the board with crackers, fruit, vegetables, olives, and dips. The mix of colors and textures makes the skulls pop beautifully.
Notes
Why You’ll Love This Halloween Mozzarella Skulls
These cheesy skulls bring a playful Halloween touch without needing much time or effort. They are mild, kid-friendly, and easy to pair with savory bites or sweet-salty board favorites.
Halloween Mozzarella Skulls Ingredients & Substitutions
- Fresh mozzarella, choose small balls or log-style mozzarella you can shape.
- Salt, for a little seasoning.
- Black pepper, optional, for a subtle savory edge.
- Fresh basil or parsley, optional, for serving.
- Assorted charcuterie board items, such as crackers, grapes, cucumber slices, cherry tomatoes, olives, and roasted nuts.
If you want to add color, serve the skulls with a bright tomato dip, pesto, or roasted red pepper spread. For a firmer shape, chill the mozzarella well before molding.
Step-by-Step Instructions to Make Halloween Mozzarella Skulls
Step 1: Chill the mozzarella
Place the mozzarella in the refrigerator until it feels firm and easy to handle. Cold cheese is much easier to shape neatly.
Step 2: Shape the skulls
Gently press the mozzarella into skull molds or shape it by hand into small skull-like forms. If you have molds, pack the cheese in firmly so it holds the details.
Step 3: Season lightly
Sprinkle the mozzarella with a little salt and, if you like, a touch of black pepper. Keep the flavor simple so the cheese stays fresh and mild.
Step 4: Unmold and arrange
Carefully remove the mozzarella skulls from the molds and place them on a serving board. Leave a little space around each one so the shape stands out.
Step 5: Build the board
Fill the rest of the board with crackers, fruit, vegetables, olives, and dips. The mix of colors and textures makes the skulls pop beautifully.
Tips for Success
Use the coldest mozzarella you can, because it is easier to shape and unmold cleanly. If your cheese sticks, lightly oil the mold with a neutral oil before filling it.
Keep the rest of the board simple and varied so the skulls remain the centerpiece. A mix of crunchy, juicy, and creamy items makes the whole platter more inviting.
Variations of Halloween Mozzarella Skulls
Try adding tiny herb leaves inside the molds for a speckled green look. You can also serve the skulls with tomato slices, basil, and a drizzle of olive oil for a caprese-style presentation.
For a more dramatic board, pair them with black olives, purple grapes, and dark rye crackers. If you want extra flavor, serve with pesto or a garlic herb dip.
Serving Suggestions: What to Pair with Halloween Mozzarella Skulls
These cheese skulls are lovely with crisp crackers, sliced baguette, grapes, strawberries, cherry tomatoes, and cucumber rounds. They also pair well with olive tapenade, hummus, or a simple marinara dip.
For a full Halloween snack board, add a few sweets like dark chocolate bark or candy corn, then balance everything with fresh fruit and savory bites.
Storage & Reheating Instructions
Store leftover mozzarella skulls in an airtight container in the refrigerator for up to 2 days. Keep them separate from wet ingredients so they stay firm.
These are best served cold, so reheating is not needed. If the cheese softens, chill it again briefly before serving.
Memories Made Around the Table
I love recipes like this because they make an everyday snack table feel festive in such an easy way. Little touches like a cheese skull can turn a casual gathering into something everyone remembers.
FAQs
Can I make these ahead of time?
Yes, you can shape the mozzarella skulls a few hours ahead. Keep them chilled until you are ready to build the board.
What mold works best?
Small silicone skull molds work best because they release the cheese easily and hold the details well.
Can I use other cheese?
You can try a firm, mild cheese that molds well, but fresh mozzarella gives the best look and texture for this recipe.
How do I keep the skulls from sticking?
Chill the cheese well and lightly oil the mold if needed. A flexible silicone mold also makes unmolding much easier.
Final Thoughts
Halloween Mozzarella Skulls are a simple way to add a spooky touch to your snack board without any fuss. They are playful, tasty, and just the kind of recipe that makes people smile when they gather around the table.