
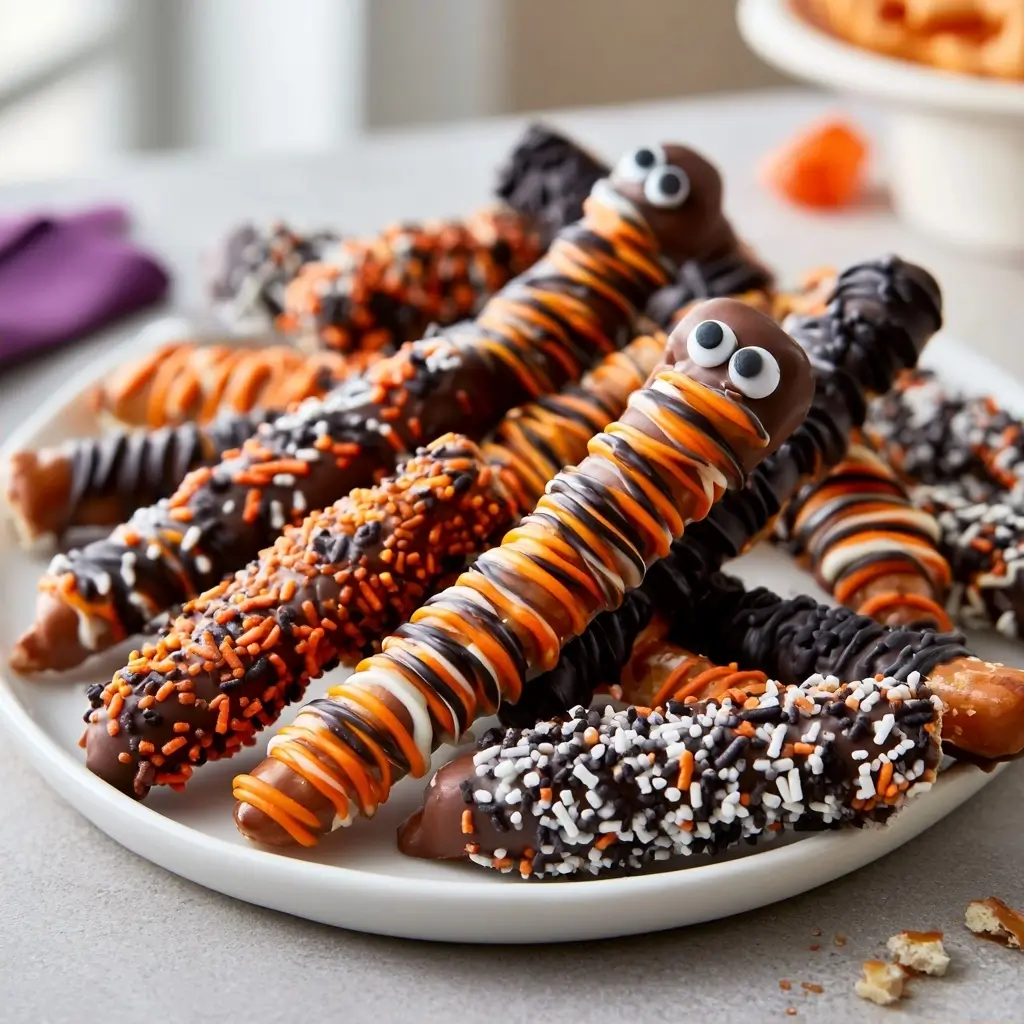
These Customizable Halloween Pretzels are such a fun little treat to make for spooky season. They are simple enough for kids and easy to dress up in all kinds of colors, sprinkles, and candy toppings.
Halloween Pretzels
Equipment
- 1 Baking Sheet lined with parchment paper
- 1 Parchment Paper
- 1 Microwave-safe Bowl
Ingredients
- 12 pretzels mini twists, rods, or squares
- 8 oz white chocolate or candy melts for coating
- 4 oz orange, purple, or black candy melts for decorating
- 2 tbsp Halloween sprinkles or any fun sprinkle mix
- mini candies such as candy eyes or small chocolate pieces
- optional toppings crushed cookies, chopped nuts, or shredded coconut
Instructions
- Line a baking sheet with parchment paper so the pretzels can set without sticking.
- Melt the white chocolate or candy melts in short bursts, stirring between each one until smooth.
- Dip each pretzel halfway into the melted coating, or drizzle it over the top for a lighter look.
- While the coating is still soft, add sprinkles, candy eyes, or any toppings you like.
- Place the decorated pretzels on the prepared tray and let them sit until firm. You can speed this up by chilling them briefly in the fridge.
Notes
Why You’ll Love This Halloween Pretzels
You get all the fun of a festive dessert with very little effort. They are crunchy, sweet, and endlessly customizable, so you can match them to any Halloween color theme or party table.
Halloween Pretzels Ingredients & Substitutions
- Pretzels, use mini twists, rods, or squares
- White chocolate or candy melts, for coating
- Orange, purple, or black candy melts, for decorating
- Halloween sprinkles, or any fun sprinkle mix
- Mini candies, such as candy eyes or small chocolate pieces
- Optional toppings, crushed cookies, chopped nuts, or shredded coconut
If you want a different look, swap the white chocolate for milk or dark chocolate. You can also use one color of candy melts for a simpler finish, then add sprinkles while the coating is still warm.
Step-by-Step Instructions to Make Halloween Pretzels
1. Prepare the tray
Line a baking sheet with parchment paper so the pretzels can set without sticking.
2. Melt the coating
Melt the white chocolate or candy melts in short bursts, stirring between each one until smooth.
3. Dip or drizzle the pretzels
Dip each pretzel halfway into the melted coating, or drizzle it over the top for a lighter look.
4. Add the decorations
While the coating is still soft, add sprinkles, candy eyes, or any toppings you like.
5. Let them set
Place the decorated pretzels on the prepared tray and let them sit until firm. You can speed this up by chilling them briefly in the fridge.
Tips for Success
Work in small batches so the coating stays smooth and easy to use. If the chocolate gets too thick, warm it gently again rather than overheating it. For the cleanest finish, let extra coating drip off before setting the pretzels on the tray.
Variations of Halloween Pretzels
Try making spider pretzels with candy eyes, mummy pretzels with thin white drizzle, or candy corn inspired pretzels using orange and yellow melts. You can also mix different pretzel shapes for a more playful party platter.
Serving Suggestions: What to Pair with Halloween Pretzels
These are lovely on a dessert board with fresh fruit, popcorn, and other bite-sized treats. They also make a cute addition to lunchbox surprises, party favor bags, or a Halloween movie night spread.
Storage & Reheating Instructions
Store the pretzels in an airtight container at room temperature for up to one week. Keep them in a cool, dry place so the coating stays crisp. There is no reheating needed, just enjoy them as is.
Memories Made Around the Table
Some of my favorite kitchen moments come from simple recipes like this one, where everyone can add their own toppings and make something playful. It is the kind of treat that feels extra special because it is made together.
FAQs
Can I make these ahead of time?
Yes, they hold up well for several days, so you can make them before your party or gathering.
What kind of pretzels work best?
Mini twists are great for snacking, while rods and squares are nice if you want more space for decorating.
How do I keep the coating smooth?
Melt it slowly, stir often, and avoid overheating. If needed, warm it again in short intervals.
Can kids help with this recipe?
Absolutely, this is a wonderful no-fuss recipe for little hands to dip, drizzle, and decorate.
Final Thoughts
These Customizable Halloween Pretzels are the kind of easy treat that brings a little extra fun to the season. Make them your own, share them generously, and enjoy every crunchy, sweet bite.