
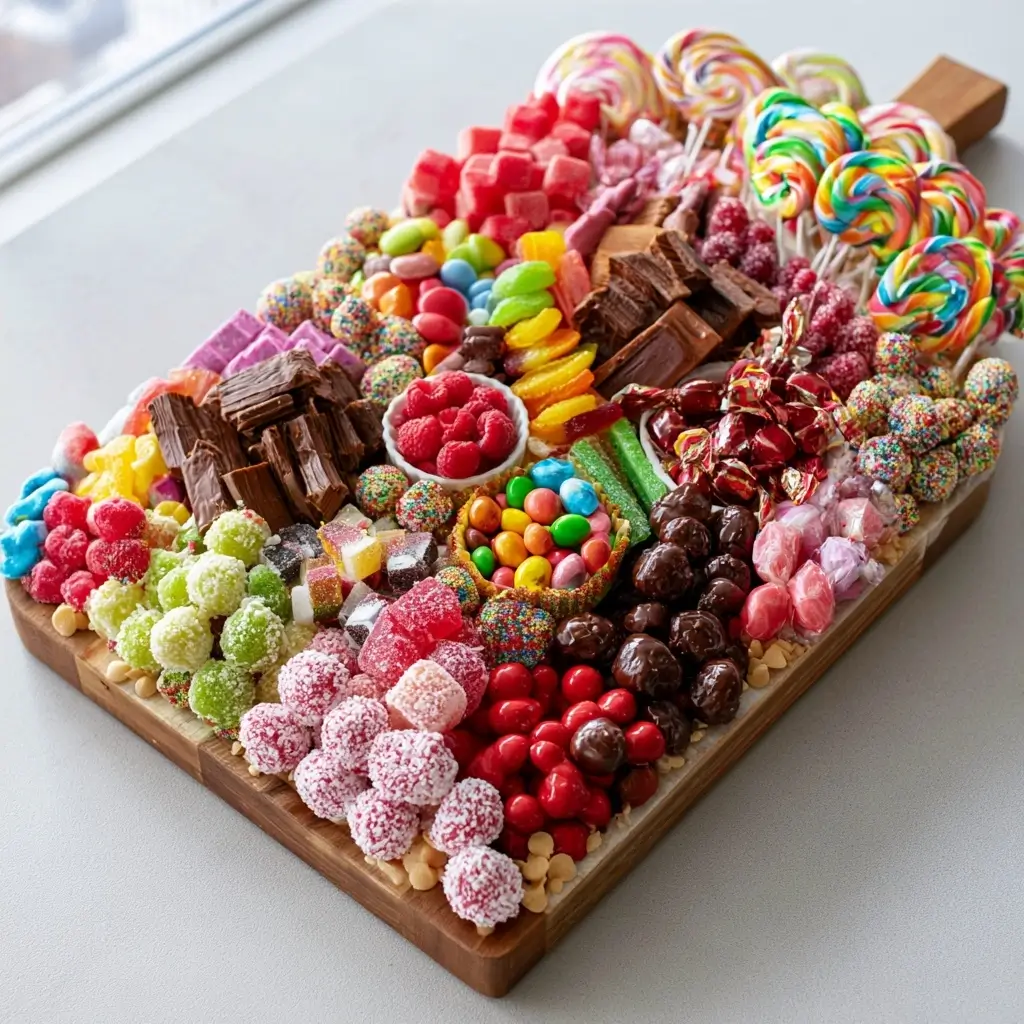
Looking for a fun party treat that feels festive without a lot of work? This candy charcuterie board is a colorful, crowd-pleasing way to serve sweets, and it is easy to customize for any celebration.
Candy Charcuterie Board
Equipment
- 1 Large platter or board
- 1 Small bowls for dips or tiny candies
Instructions
- Pick a large platter, tray, wooden board, or even a clean baking sheet. The bigger the surface, the easier it is to create pretty sections.
- Place any small bowls for dips or tiny candies around the board. These help anchor the layout and make the setup look organized.
- Set down cookies, fruit, marshmallows, and any packaged treats first. Spread them out in small clusters so every section has something different.
- Pour or place the candies into the open spaces. Group similar colors together, then tuck smaller pieces into gaps to make the board look full.
- Add crunchy snacks, extra chocolate, and any final decorative touches. Step back and adjust a few pieces until the board looks balanced and abundant.
Notes
Why You’ll Love This Candy Charcuterie Board
This sweet platter is all about variety, color, and easy assembly. You can mix chewy candies, chocolate treats, crunchy snacks, and fruity favorites to create a display that looks impressive and invites everyone to graze.
Candy Charcuterie Board Ingredients & Substitutions
Start with a mix of textures and colors so the board feels balanced and fun.
- Assorted candies, like gummy candies, sour candies, hard candies, and chewy fruit candies
- Chocolate pieces, such as chocolate squares or chocolate-covered treats
- Crunchy snacks, like pretzels, popcorn, or crispy wafers
- Fresh fruit, such as strawberries, grapes, or orange slices
- Marshmallows or marshmallow treats
- Cookies or wafer rolls
- Small bowls of dips, like fruit dip, chocolate dip, or peanut butter dip
- Optional extras, sprinkles, chocolate chips, or nut-free toppings
If you need swaps, use dried fruit instead of some candy, or add more cookies and popcorn for a less sweet mix. You can also change the colors to match a birthday theme, holiday table, or baby shower.
Step-by-Step Instructions to Make Candy Charcuterie Board
Step 1: Choose your board
Pick a large platter, tray, wooden board, or even a clean baking sheet. The bigger the surface, the easier it is to create pretty sections.
Step 2: Add the bowls first
Place any small bowls for dips or tiny candies around the board. These help anchor the layout and make the setup look organized.
Step 3: Arrange the larger items
Set down cookies, fruit, marshmallows, and any packaged treats first. Spread them out in small clusters so every section has something different.
Step 4: Fill in with candy
Pour or place the candies into the open spaces. Group similar colors together, then tuck smaller pieces into gaps to make the board look full.
Step 5: Finish with texture and color
Add crunchy snacks, extra chocolate, and any final decorative touches. Step back and adjust a few pieces until the board looks balanced and abundant.
Tips for Success
Use a mix of shapes and sizes so the board looks interesting from every angle. Keep sticky candies separate from crisp snacks when possible, and chill chocolate items if your room is warm. If you are serving a large group, make two smaller boards instead of one oversized one.
Variations of Candy Charcuterie Board
You can build this idea around a color theme, like pink and white, rainbow, or pastels. For a movie night version, lean into popcorn, chocolate, and chewy bites. For a birthday party, use the guest of honor’s favorite candies and add matching sprinkles or ribbon accents.
Serving Suggestions: What to Pair with Candy Charcuterie Board
This sweet platter pairs nicely with lemonade, sparkling water, milk, coffee, or hot cocoa depending on the season. It also works well alongside cupcakes, brownies, or a simple fruit tray if you want a bigger dessert spread.
Storage & Reheating Instructions
Store leftovers in airtight containers, separating soft candies from crunchy snacks when you can. Keep chocolate and marshmallows in a cool, dry place. Since this is a no-cook treat, there is no reheating needed, but it is best served fresh for the prettiest presentation.
Memories Made Around the Table
Some of my favorite party moments happen when everyone gathers around a beautiful snack board and builds a little plate of their own. A candy charcuterie board makes those moments easy, playful, and sweet, which is exactly why it is such a fun choice for celebrations.
FAQs
How far in advance can I make a candy charcuterie board?
You can assemble it a few hours ahead of time, especially if you keep it covered in a cool spot. If you are adding fresh fruit, wait until closer to serving time so everything stays fresh.
What candies work best for a sweet platter?
Choose a mix of chewy, crunchy, chocolatey, and fruity candies. The best boards usually include different colors and textures so each bite feels fun and varied.
How do I keep the board from looking empty?
Fill in gaps with small candies, pretzels, sprinkles, or tiny chocolates. Using clusters instead of straight lines helps the board look fuller and more inviting.
Can I make this without nuts?
Yes, just choose nut-free candies, cookies, and toppings. Always check labels carefully if you are serving guests with allergies.
Final Thoughts
This candy charcuterie board is such an easy way to make dessert feel festive and special. With a few favorite sweets and a pretty arrangement, you can create a party centerpiece that is simple, fun, and memorable.