
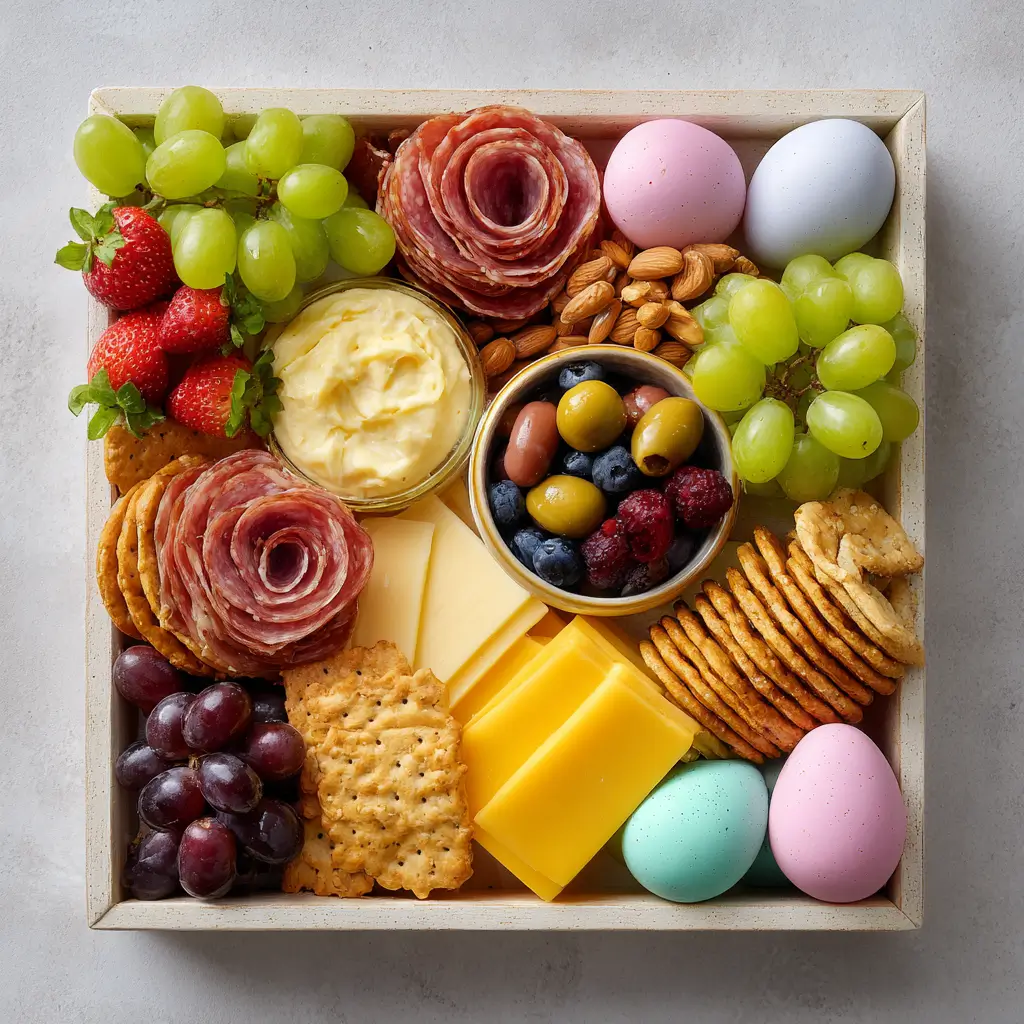
This baby shower charcuterie board is a joyful, easy way to feed a crowd while making the table look beautiful. It mixes sweet, savory, and colorful bites so guests can graze and chat with ease.
Baby Shower Board
Equipment
- 1 Large board or platter
- 3 Small bowls for dips
Ingredients
Board Ingredients
- 8 oz assorted cheeses such as cheddar, gouda, brie, or mozzarella balls
- 8 oz turkey slices or roast beef or chicken slices
- 8 oz crackers or breadsticks or sliced baguette
- 2 cups fresh fruit such as strawberries, grapes, blueberries, melon, or kiwi
- 2 cups vegetables such as cucumber rounds, baby carrots, bell pepper strips, or cherry tomatoes
- 1 cup dip such as hummus, ranch dip, or whipped cream cheese
- 1 cup sweet touches such as chocolate-covered strawberries, cookies, or yogurt-covered pretzels
- 1 /4 cup nuts or seeds optional
- 1 small handful fresh herbs or edible flowers for garnish
Instructions
- 1. Choose your board. Pick a large platter, wooden board, or tray with enough room for variety. A bigger surface makes it easier to create pretty groupings without crowding everything together.
- 2. Place the anchor items. Start with the largest items first, like cheese wedges, small bowls of dip, and piles of sliced meat. Spreading these around the board helps create structure.
- 3. Add the fruit and vegetables. Fill in the open spaces with fresh fruit and crunchy vegetables. Try to alternate colors so the board feels bright and balanced.
- 4. Tuck in crackers and bread. Fan out crackers, stack breadsticks, or add sliced baguette in a few spots. Place them near cheese and dip so guests can easily build a bite.
- 5. Finish with sweet bites and garnish. Add cookies, chocolate-dipped fruit, or pretzels to create little pockets of sweetness. Then tuck in fresh herbs or edible flowers for a polished final touch.
Notes
Why You’ll Love This This Treat
There is something special about a board that feels both festive and relaxed. It comes together with simple store-bought ingredients, and you can adjust every section to match your guest list, your color palette, and the time you have.
This Treat Ingredients & Substitutions
Build your board with a mix of fresh, creamy, crunchy, and sweet items. Here is a flexible list to get you started:
- Assorted cheeses, such as cheddar, gouda, brie, or mozzarella balls
- Turkey slices, roast beef, or chicken slices
- Crackers, breadsticks, or sliced baguette
- Fresh fruit, such as strawberries, grapes, blueberries, melon, or kiwi
- Vegetables, such as cucumber rounds, baby carrots, bell pepper strips, or cherry tomatoes
- Dip options, such as hummus, ranch dip, or whipped cream cheese
- Sweet touches, such as chocolate-covered strawberries, cookies, or yogurt-covered pretzels
- Nuts or seeds, if desired
- Fresh herbs or edible flowers for garnish
If you want to keep the look soft and celebratory, lean into pale cheeses, pink fruit, green grapes, and light crackers. You can also use dairy-free cheese or plant-based dip if that works better for your guests.
Step-by-Step Instructions to Make This Treat
1. Choose your board
Pick a large platter, wooden board, or tray with enough room for variety. A bigger surface makes it easier to create pretty groupings without crowding everything together.
2. Place the anchor items
Start with the largest items first, like cheese wedges, small bowls of dip, and piles of sliced meat. Spreading these around the board helps create structure.
3. Add the fruit and vegetables
Fill in the open spaces with fresh fruit and crunchy vegetables. Try to alternate colors so the board feels bright and balanced.
4. Tuck in crackers and bread
Fan out crackers, stack breadsticks, or add sliced baguette in a few spots. Place them near cheese and dip so guests can easily build a bite.
5. Finish with sweet bites and garnish
Add cookies, chocolate-dipped fruit, or pretzels to create little pockets of sweetness. Then tuck in fresh herbs or edible flowers for a polished final touch.
Tips for Success
Keep the board chilled until serving time, especially if you are using soft cheeses or fresh dips. For the prettiest result, use a mix of shapes, triangles, rounds, sticks, and clusters make the board look abundant without needing tons of ingredients.
If you are serving outdoors, set out the most delicate items later so they stay fresh. You can also prep the ingredients ahead of time and assemble the board shortly before guests arrive.
Variations of This Treat
For a sweeter board, focus on fruit, mini muffins, cookies, and yogurt dips. For a more savory version, add extra cheeses, olives, roasted nuts, and more sliced meats.
You can also make the theme match your party colors. Soft pinks, creams, and greens work beautifully for a baby shower, but you can easily switch to a blue, neutral, or pastel palette.
Serving Suggestions: What to Pair with This Treat
Serve the board with sparkling water, lemonade, iced tea, or a light fruit punch. It also pairs nicely with mini sandwiches, a fresh green salad, or a simple soup if you want to round out the menu.
Storage & Reheating Instructions
Store leftovers in separate airtight containers in the refrigerator. Crackers and bread are best kept apart so they stay crisp.
There is no reheating needed for this board. If the cheese has chilled too long, let it sit at room temperature for 15 to 20 minutes before serving again so the flavors soften.
Memories Made Around the Table
Boards like this always seem to bring people closer together. Guests naturally linger, reach for little bites, and start talking, which is exactly the kind of easy warmth that makes a celebration feel memorable.
FAQs
How far ahead can I make a baby shower charcuterie board?
You can prep most ingredients a few hours ahead. Slice fruit, wash vegetables, and portion dips early, then assemble the board closer to serving time for the freshest look.
What size board do I need?
That depends on your guest count. For a small group, a medium platter works well. For a larger shower, use a big board or multiple trays so everyone can reach comfortably.
How do I keep the board looking full?
Use small clusters, overlap ingredients slightly, and fill gaps with grapes, nuts, herbs, or crackers. A full-looking board is mostly about smart placement, not huge amounts of food.
Can I make this without meat?
Yes, absolutely. Add extra cheeses, hummus, fruit, nuts, olives, and vegetables to create a beautiful meatless spread that still feels varied and satisfying.
Final Thoughts
This baby shower charcuterie board is simple to assemble, easy to customize, and lovely to serve. With a thoughtful mix of colors and textures, it turns everyday ingredients into a celebration centerpiece.